Before / After – Sammy Hagar & The Circle
THE STORY
love when the hardest part of a show is not the editing, but deciding which of the dozens of cool shots you will edit and publish. It's an embarrassment of riches that I experienced at tonight's Sammy Hagar & The Circle show.
In years past, being put at the soundboard instead of the pit for a show usually meant boring photos from far away. It seems that these days, a lot of the soundboard shoots have such large and visually interesting lighting and stage setups that the still look great in photos – sometimes arguably even better, from so far away. While I would almost always prefer to shoot from the pit, I’m super appreciative of bands and lighting directors who create visuals that fill the stage and the camera frame!
THE EDIT
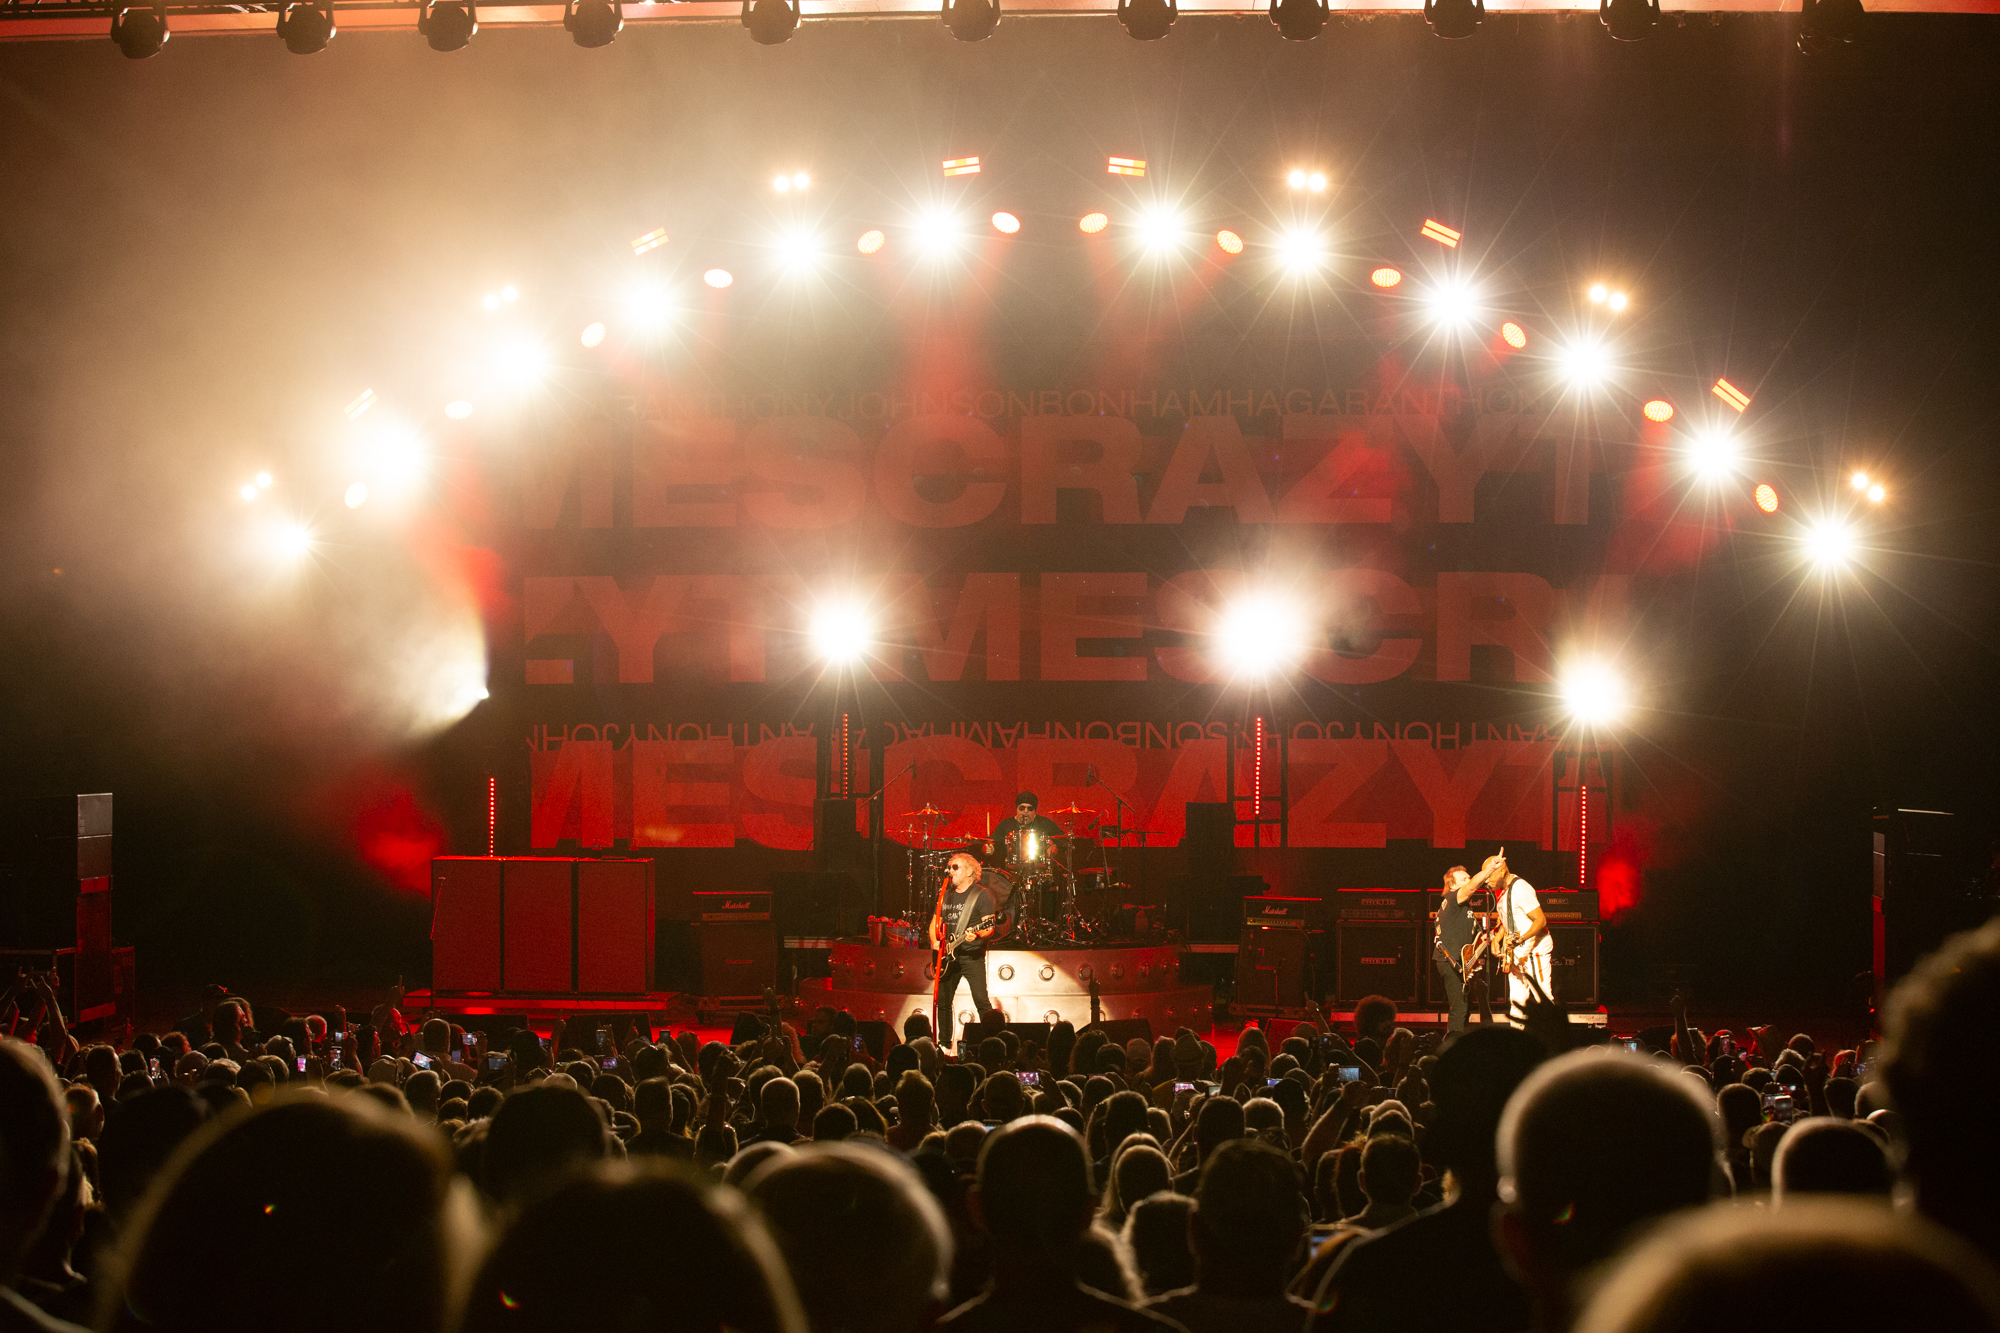
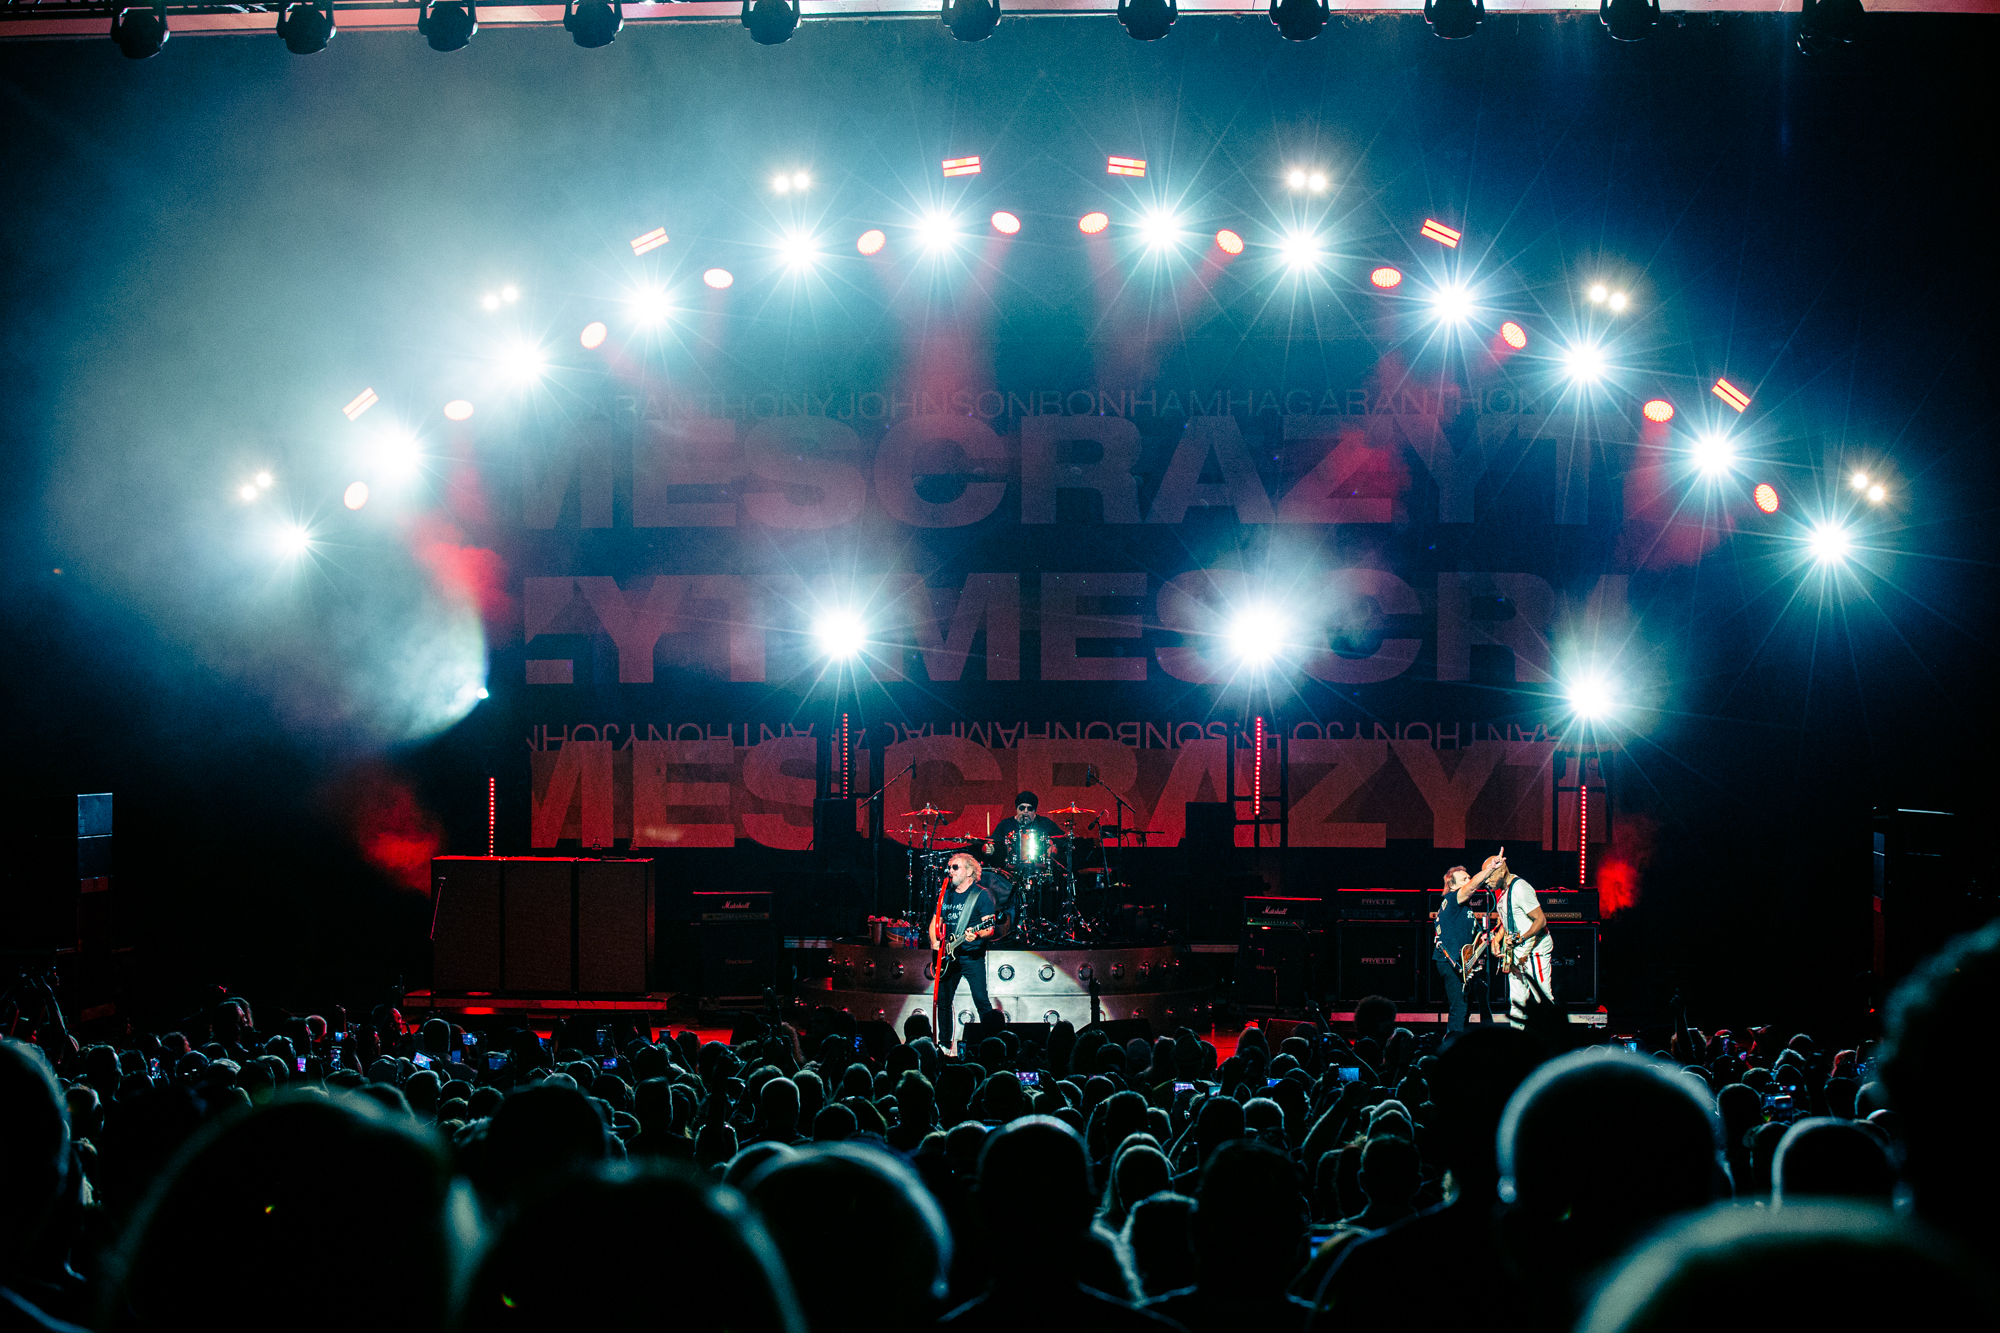
Straight out of camera, this photo didn’t need much. It’s well exposed, in focus and with minimal noise. The only thing I noticed right away was that the white balance was a little warm (yellow is warm, blue is cool).
As with all edits, the first thing I did is apply my high contrast, neutral color preset. This got me pretty close to what I wanted but I still had some tweaks to make. One thing I run into often on full stage shots like this one is that the performers are lit by spotlights and the rest of the stage is pretty dark. If I adjust the exposure of the entire image, it looks like a halo of lights at the top with a bunch of darkness and some people floating in it. Okay, maybe I’m exaggerating a bit, but the loss of detail in the background where the amps and other equipment really takes away from the feel of the photo and removes a lot of context.
Instead, what I do is brighten up the exposure to what I want for the background and crowd and then use the highlights adjustment to bring down the parts of the image that become over exposed by boosting the exposure. I’m careful to make sure that I don’t bring down the highlights too much that it makes the lights look unnatural though. If I encounter that, then I use the brush tool to adjust the highlight level of just the specific areas I want to affect. In this instance though, a subtle lowering of the highlights does the trick.
I then turned to the white balance, bringing the color temperature down to make the skin tone more natural. When I get the skin looking how I want it, I don’t really like the color of the lights. They have a bit of a green cast to them that just looks off to me. Generally speaking, I think lights that are supposed to look neutral, should either be warm (yellow) or cool (blue). When “white” light veers too far from those, to me it always looks unnatural. Maybe this is because we perceive the sky as blue and the sun as yellow – or maybe it’s just me. So, to counteract that, I head to the color grading to do some split toning. Instead of adjusting the highlights, I do something a bit counterintuitive. I adjust the shadows. See, it’s not really the highlights that we want to affect, it’s the falloff from the brightest part of the center of the light to the darkness of the background where the green cast is most noticeable. I add a little blue and it immediately looks much better to my eyes.
Now that we have the basics of the exposure, white balance and color grading, it’s time to turn to the detail. My preset already has the black levels lowered significantly and the contrast up, this makes the details really stand out. With some adjustments to the dehaze, texture and clarity sliders, I settle on a final look for this image.
Much of what we’ve done to this image is really subtle and each change on it’s own doesn’t drastically change the image, but the combination really makes the image stand out. It’s really all about looking carefully at each aspect and asking myself, “how can I make this better” and all of those incremental changes are what take it from an okay photo to one I’m proud to publish and share!
THE DETAILS
LOCATION – Cincinnati, OH
VENUE – Riverbend Music Center
DATE – August 24, 2022
PHOTOGRAPHER – Brian Bruemmer, Rubatophoto.com
CAMERA – Canon 6D
LENS – Canon EF 70-200mm f/2.8 IS II
APERTURE – f/5.0
SHUTTERSPEED – 1/400
FOCAL LENGTH – 80mm
ISO – 3200
SOFTWARE – Adobe Lightroom Classic

Musician, concert photographer, writer, podcast host and founder of The Hot Mic Music Magazine.
-
Brian Bruemmerhttps://thehotmic.co/author/brian-bruemmer/
-
Brian Bruemmerhttps://thehotmic.co/author/brian-bruemmer/
-
Brian Bruemmerhttps://thehotmic.co/author/brian-bruemmer/
-
Brian Bruemmerhttps://thehotmic.co/author/brian-bruemmer/